- Home
- Special Helps
- Photo Guides
- Menu Ideas & Special Occasions
- Meal Ideas without Recipes
- Creative Food Ideas
- Appetizers
- Beverages
- Biscuits & Breads
- Breakfast
- Preserved Foods & Cheese
- Desserts
- Main Courses
- Chinese
- Mexican
- Sandwiches
- Salads & Salad Dressings
- Sauces & Gravies
- Side Dishes
- Soups, Chili & Stews
- Miscellaneous
- chickenandeggcookbook.com
Meat Drippings Salt And Pepper, To Taste Flour Chopped, Sautéed Onion, Optional Water Milk Or Half And Half, Optional
***While cooking your meat (roasted chicken or turkey, pork chops or roast, beef roast, Swiss steak), make sure to save any drippings, brownings or juices that are produced.***
If you are browning your meat prior to roasting or baking (fried chicken, Swiss steak, etc), transfer some of the oil used in the browning process to the roasting/baking pan as well. How much oil depends on how lean your meat is. The leaner the meat, the more oil you should transfer to the pan. Then deglaze pan and transfer the brownings (1st deglazing). If by chance you burn your brownings, which is easy to do when the meat has been floured (as in fried chicken or Swiss steak), DO NOT add or your gravy will have that same burnt taste.
If you want some more flavor in your gravy, you can add some chopped raw onion to the meat while baking. The onion will help to flavor the meat while cooking and will go nicely in your gravy as well.
When your meat of choice has finished cooking, remove the baking pan. Hopefully, you will have the butter and/or juices that have come off the meat in the bottom of the pan. Transfer juices to skillet, along with any other drippings and brownings from earlier in the cooking process. If any brownings remain in the baking pan, deglaze with a little bit of water and transfer to skillet (2nd deglazing).
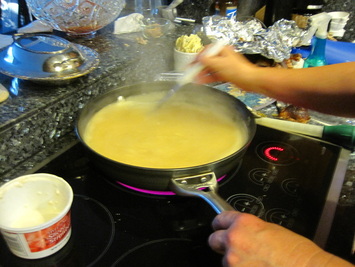
In a coffee cup, make a mixture of flour and water, not too thick, but a good consistency and as free from lumps as possible. Any lumps here will end up as lumps in your gravy. Add a little bit of your flour/water thickening mixture to the juices, stirring until completely blended. Bring the juices to a simmer, stirring constantly as the mixture thickens. Then start to pour your flour/water mixture in slowly and a little bit at a time, continuing to stir constantly. If you add too much, too fast, you will end up with lumpy gravy. Stop every once in awhile to check to see if it is the consistency that you want. If you get it a little too thick, add a little liquid to thin it back down, but try to keep that to a minimum so that you don't dilute the taste away. Use milk for chicken or pork gravies, and use water for beef and turkey gravies. When you have it to the right consistency, give it a taste and season with salt and pepper (or other spices if you want).
A note about lumps: having a smooth flour/water mixture to start with and then constant stirring while adding it is key, as the flour starts to cook as soon as in comes in to contact with heat. If you only have a few small lumps, you can generally use a whisk to smooth it out. If you do end up with lumps, it just makes it "home style." And when all else fails, and the gravy is overly lumpy - take a stick blender to it!
Recipe - Calla and April Ferre
"Gravy ... this has been one of my biggest challenges, and I'm only now getting a better feel for it. The key is lots of butter (in roasting chicken or turkey), or else there won't be anything to make the gravy with in the end." - April Ferre


